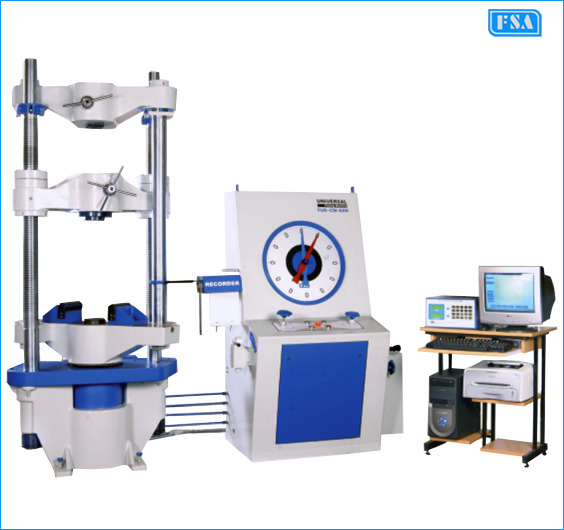
• The DC valve is provided which directs oil flow either to analogue or computerized control panel. One can use one
system at a time.
• Both Analogue & Computerized control panel is provided.

| MODEL | TUE-CN-100 | TUE-CN-200 | TUE-CN-400 | TUE-CN-600 | TUE-CN-1000 | TUE-CN-2000 |
| Analogue System | ||||||
| 1’st Range (kN) | 0 - 100 | 0 - 200 | 0 - 400 | 0 - 600 | 0 - 1000 | 0 - 2000 |
| Least Count (kN) | 0.2 | 0.4 | 0.8 | 1 | 2 | 4 |
| 2’nd Range (kN) | 0 - 50 | 0 - 100 | 0 - 200 | 0 - 300 | 0 - 500 | 0 - 1000 |
| Least Count (kN) | 0.1 | 0.2 | 0.4 | 0.5 | 1 | 2 |
| 3’rd Range (kN) | 0 - 25 | 0 - 50 | 0 - 100 | 0 - 120 | 0 - 250 | 0 - 500 |
| Least Count (kN) | 0.05 | 0.1 | 0.2 | 0.2 | 0.5 | 1 |
| 4’th Range (kN) | 0 - 10 | 0 - 20 | 0 - 40 | 0 - 60 | 0 - 100 | 0 - 200 |
| Least Count (kN) | 0.02 | 0.04 | 0.08 | 0.1 | 0.2 | 0.4 |
| Computerised System | ||||||
| Measuring Range (kN) | 0 - 100 | 0 - 200 | 0 - 400 | 0 - 600 | 0 - 1000 | 0 - 2000 |
| Least Count (kN) | 0.01 | 0.02 | 0.04 | 0.06 | 0.1 | 0.2 |
| Load Range in kN with accuracy of measurement ±1% | 2 to 100 | 4 to 200 | 8 to 400 | 12 to 600 | 20 to 1000 | 40 to 2000 |
| Resolution of Piston Movement (mm) | 0.1 | 0.1 | 0.1 | 0.1 | 0.1 | 0.1 |
| Over all dimensions approx. (mm) | 1950 x 800 x 1850 | 2000 x 800 x 1900 | 2100 x 800 x 2060 | 2200 x 800 x 2400 | 2350 x 800 x 2700 | 3000 x 800 x 3600 |
| Weight approx. (kg.) | 1300 | 1400 | 2200 |
3200 |
4200 |
8600 |
| MODEL | TUE-CN-100 | TUE-CN-200 | TUE-CN-400 | TUE-CN-600 | TUE-CN-1000 | TUE-CN-2000 |
| Measuring Capacity (kN) | 100 | 200 | 400 | 600 | 1000 | 2000 |
| Max. Tensile Clearance at fully decended piston position (mm) | 50 - 700 | 50 - 700 | 50 - 700 | 50 - 800 | 50 - 850 | 50 - 900 |
| Max. Clearance for Compression Test (mm) | 0 - 700 | 0 - 700 | 0 - 700 | 0 - 800 | 0 - 850 | 0 - 900 |
| Distance between columns (mm) | 450 | 500 | 500 | 600 | 750 | 850 |
| Piston Stroke (mm) | 150 | 200 | 200 | 250 | 250 | 300 |
| Max. straining speed at no load (mm/min) | 300 | 150 | 150 | 100 | 80 | 45 |
| Power Supply | 3 phase 415V 50Hz AC | |||||
| Total H.P. | 1.5 | 1.5 | 2.5 | 2.5 | 4.0 | 6.5 |
| MODEL | TUE-CN-100 | TUE-CN-200 | TUE-CN-400 | TUE-CN-600 | TUE-CN-1000 | TUE-CN-2000 |
| Pair for compression plate dia (mm) | 120 | 120 | 120 | 120 | 160 | 220 |
| Tension Test Jaws | ||||||
| For Round Specimen dia (mm) | 10 - 20 | 10 - 20 | 10 - 25 | 10 - 25 | 10 - 30 | 20 - 40 |
| For Round Specimen dia (mm) | 20 - 30 | 20 - 30 | 25 - 40 | 25 - 40 | 30 - 50 | 40 - 60 |
| For Round Specimen dia (mm) | - | - | - | 40 - 55 | 50 - 70 | 60 - 80 |
| For Flat Specimen Thickness (mm) | 0 - 10 | 0 - 10 | 0 - 15 | 0 - 15 | 0 - 22 | 0 - 22 |
| For Flat Specimen Thickness (mm) | 10 - 20 | 10 - 20 | 15 - 30 | 15 - 30 | 22 - 44 | 22 - 45 |
| For Flat Specimen Thickness (mm) | - | - | - | - | 44 - 65 | 45 - 70 |
| Max. width of Flat Specimen (mm) | 50 | 50 | 65 | 70 | 70 | 90 |
| Transverse Test | ||||||
| Adjustable Roller Support of width (mm) | 150 | 150 | 150 | 160 | 160 | 200 |
| Diameter (mm) | 30 | 30 | 30 | 50 | 50 | 70 |
| With Max. adjustable clearance (mm) | 450 | 500 | 500 | 600 | 800 | 900 |
| Punch tops of radius (mm) | 6 | 6 | 10 | 16 | 16 | 30 |
| Punch tops of radius (mm) | 12 | 12 | 16 | 22 | 22 | 40 |